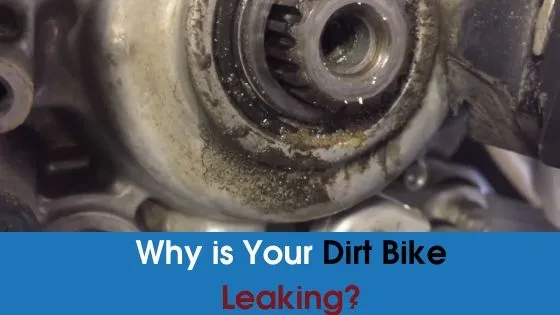
If you have noticed that your dirt bike is leaking oil, then you might feel embarrassed because the exact same thing has occurred to me, and I can therefore understand how you are feeling in this circumstance.
Because of this, I have made the decision to share with you what I have discovered in the past when I was also struggling with the same problem.
If you want to get out of this situation, then you must not skip through these 5 causes of the leakage of dirt bike oil. They are the only way out of this predicament.
Why is My Dirt Bike Leaking Oil?
The parts that cause dirt bike oil to leak include worn gaskets and o-rings. Crankcase gasket failure is the most frequent source of oil leaks, although other major causes include gasket failure, O-ring wear and tear, connection tube failure, shaft seal failure, and oil filter cover gasket and ring failure.
Now let’s discuss each potential reason for an oil leak in a dirt bike in more detail:
- Fork seal Wear
- Damaged Shaft Seal
- Cylinder Head
- Crankcase Gasket
- O-rings wear and tear
- Oil drain plug washer
1. Fork Seal Wear
Leaks can occur in the seal of a dirt bike as a result of normal wear and tear, the cycle of life, and the collection of debris.
It’s probable that the deformations in the metal, such as scratches and dents, are what’s causing your fork seals to leak.
On the other hand, most of the time when your fork seals are leaking, it is simply because there is debris trapped in the seal, holding it open and letting fork oil to leak out. It is the most common source of fork seal problems.
2. Damaged Shifter Seal
Because of the connection between the shifter lever and the shifter seal, the shifter seal can be reached from the engine case by going via the shifter lever. The majority of dirt bikes have a rubber oil seal that wraps around the shaft of the engine.
This rubber, after some time has passed, will become brittle and will lose some of its capacity to seal, which will cause there to be a leak. It is possible for the shift shaft seal to become ineffective due to excessive wear, which can be brought on by a high volume of use, as well as contaminated oil.
If the engine casings have not been broken, your oil leak can be rectified by acquiring a new seal and putting it in its previous location. This is presuming, of course, that the oil leak can be fixed.
3. Cylinder Head
If the sealer on the cam tower has been used for a long time and has become more rigid, then the cylinder head will leak oil.
When oil builds up on the surface of a cylinder, it collects dirt, which makes the cylinder look unappealing.
4. Crankcase Gasket
As the crankcase gasket ages, it becomes more rigid and loses its ability to seal properly.
The cause of leakage is determined to be wear and tear in the form of visible damage, which occurs when there is a physical breach in the structure.
In the event that the gasket is not installed appropriately, this could result in oil leaking.
5. O-rings wear and tear
A significant part of oil leaks can be attributed to gaskets and o-rings that have been worn over the course of their service lives.
The components that have the second highest probability of being the source of a leak are the timing chain gasket or o-ring, the oil filter cover gasket or ring, and the outer clutch cover gasket or o-ring.
This is after the crankcase gasket, which has the highest probability of being the source of a leak.
Because of the passage of time, these gaskets and o-rings need to be replaced the vast majority of the time because they become worn out.
When you are rebuilding your engine, one additional thing you should keep in mind is that you should always use new gaskets to guarantee that there is no oil seepage.
It is one of the most important things you can do to prevent leaks from occurring.
6. Oil drain plug washer
Copper is the most common material used in the oil drain plug washer, which is the location of one of the most straightforward sorts of oil leaks that can occur (also known as a crusher washer).
We strongly recommend changing this component at each oil change in order to minimize oil leaks; nonetheless, some riders will attempt to get several oil changes out of a single washer.
If oil is dripping from the drain plug of the engine, then the problem is usually not too complex, and it should not cost too much to remedy it.
How To Stop Oil Leakage of Dirt Bike Engine?
Fixing the Leaky Fork Seal
Your fork seals can be fixed in three simple steps. We’ll go over the tools you need to execute the task correctly before getting into those steps.
You’ll also need a rhino, clean paper towels for suspension, clip tools, a screwdriver, and safety glasses.
Preparing the Bike
Before continuing, you’ll clean the bike, and the port guard needs to be removed.
Pulling down the dust seal
Use the clip tool is what you should do. You might use a screwdriver; you want to gently fall from all around and use your clip tool or screwdriver to draw down the dust seal, which causes the dirt and debris to start sliding down.
The fork is off the bike, as you can see, which provides an additional option. It’s a little bit simpler to get access to if you draw down the dust seal insert, gently spin the upper tube, and pull the dust seal down.
Cleaning Under the fork seal
Put that gently into our oil seal, then turn this 360 degrees. What will happen is that dirt and debris will softly descend from the fork itself, ideally dislodging any particles that may be causing the fork seal to leak as you enter your seal.
Make sure to get it through the oil’s inner lip’s spring. Seal, twist the upper tube after which you can remove the extra dirt, and then spray suspension clean liberally to remove any remaining large dirt material.
Step 1: Lose the chain, then open it
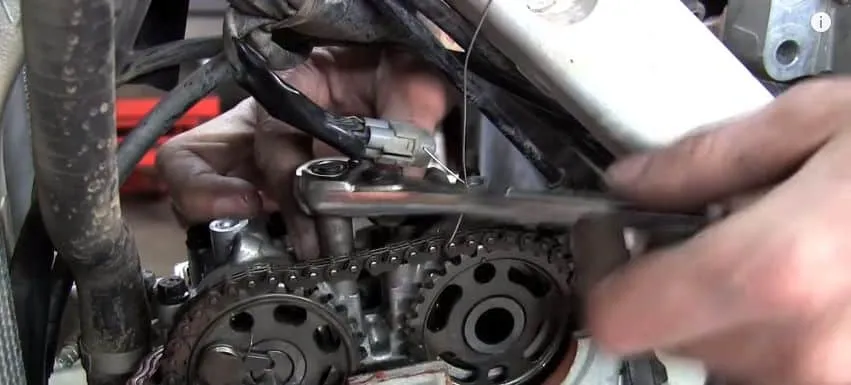
Step 2: Uncover the area around the engine and open the nut.
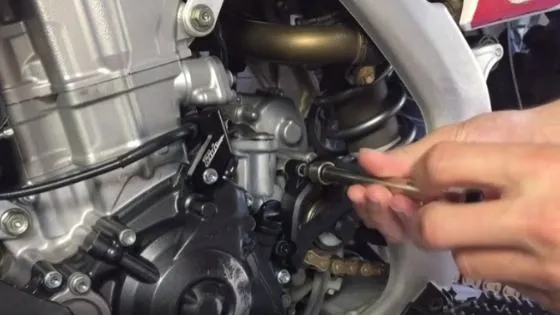
Step 3: Now remove the sprocket
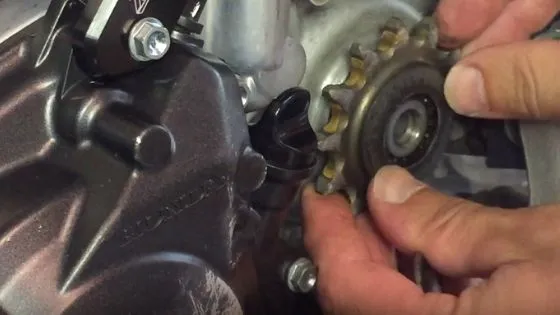
Step 4: Now, you will see the dirt with oil spread all over it.
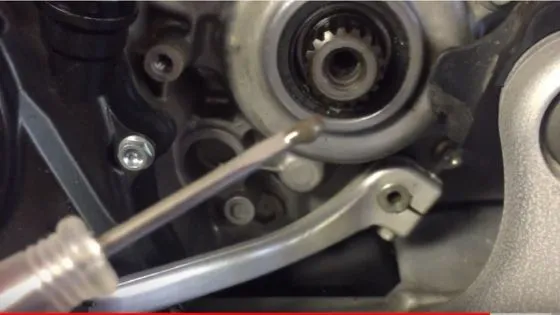
Step 5: open the seal.
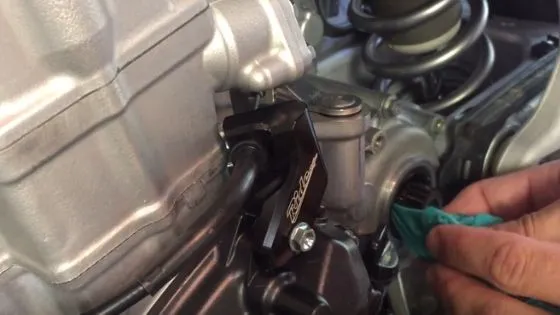
Step 6: Finally, you have to clean the seal and the inside of the shaft with a rig.
Fork Seal Maintaining Tips
If you’re using a power washer, it’s recommended to rinse the tube if it’s covered with dirt. To avoid forcing water and mud up behind the seal, you should be careful not to point the power washer towards it.
If the tube is heavily soiled, just rinse it with water and then wipe it off with a sponge dipped in soapy water. Avoid producing any vertical scratches, though, since these might cause the seals to become vulnerable to oil leakage.
If you must wipe, it is much better to do it in this direction.
After you’ve cleaned the fork, check the air-take tube in the back that is shielded by the fort protection.
If you drop it upon rocks or something similarly hard, it may scratch or dent. If it’s just a very minor scratch, you can repair it with some very fine sandpaper; but, if it’s a more significant damage or dent, you should definitely replace the tube.
When you ride in the mud, you may notice that the mud can collect inside the dust seal, move inside the seal, and eventually result in an oil leak. Therefore, it’s a good idea to pull the seal down and check the interior after a dirt ride to make sure it’s clean.
Use a flat-bladed screwdriver or a specialized dust seal removal tool with a thin blade to remove the dust seal. Whichever method you choose, be careful not to slip and harm the fork tube.
It is therefore a good idea to move around and complete it in several places. To use the tool, you just insert it between the upper fork tube and the seal and then twist.
Then, it ought should simply pop off, revealing that the dust seal is clear of any debris. The other side can simply be replaced or checked.
Use some parts cleaner and pressure it to blow out any dirt if you wish to clean it out.
Fixing a Leaky Shaft Seal
Simple signs include the presence of oil, a beginning blackening of the chain due to the oil, and the development of a little amount of gunk on the sprocket.
This gunk is caused by the oil that the chain is bringing from the area surrounding the sprocket and depositing into the back region.
The first thing you must do is remove the chain, and if necessary, the master link. So it’s quite simple for you to remove the chain.
You are not required to remove the back wheel. After that, there is a knot that can be removed with a range; this knot is a washer that is intended to hold the nut and the sprocket in place. There is also a special claim that is meant to hold the seal in place.
The entire safety system can be taken off by unscrewing the bolts, revealing the seal we previously mentioned. The seal needs to be changed, yet in some situations all that’s required is a simple cleaning. The crankshaft can occasionally become clogged with dust and grime with small particles.
It is quite simple to begin cleaning. Get rid of all the dust and grime that is surrounding the seal. After that, you’ll reinstall your sprocket and put it back in.
You will then insert your sprocket. Then you’ll attach your washer and nut, and you can reassemble the bike and test it to see if it fixes the issue. On occasion, it’s just a few tiny dust particles that get into a metal component that cause issues.
Replacing the Leaky Shaft Seal
You’ll need screws, a drill, grease, cloths for cleaning contacts, and safety glasses. Make the region around the shift shaft seal available to start.
You must shut off the fuel and lean this bike against the bench. If necessary, remove the countershaft sprocket using a chain to allow access to the shift shaft seal region.
Use the marker to mark the foot shifter’s location on the shift shaft before removing it. Clean the area around the shift shaft seal after removing the shifter. So these seals now come in a variety of forms. Some will have a rubber coating, while others may have an outside diameter made of metal.
The old shift shaft seal picks up a screw that is just a little bit smaller than one of its sides before we start the extraction procedure.
Grab a drill bit that is just a little bit smaller in diameter than the screw itself at this point. We can guarantee that the screw will get a good bite when you put it by drilling into the ship shaft seal first.
The next step is to carefully drill a hole into the seal with your drill bit, being cautious to avoid damaging the engine’s casing or the shift shaft. Don’t drill too far to prevent drilling into other objects.
As soon as it comes to pulling on the fastener to try to get the seal to come out, set the screw in place, grab the screw head with some pliers, and pull the seal out.
It will require some force because the smaller seals fit more tightly. So just keep pulling on it and don’t give up.
Install New Shift Shaft
Be sure to comprehend and take note of the orientation of the new shift shaft seal before installing it. One side will face the shifter while the other will face the lubricated side of the engine. You must investigate it.
The shaft and the fresh seal with grease slide the fresh shift shaft seal into place. Spend some time on this phase. Take care not to harm the seal by handling it carelessly.
However, with this form of seal, we’re going to use a socket that is around the same size in diameter. Depending on the type of seal you have, if it’s just a rubber one, you might be able to press it into place with only your fingers.
The shaft seal must then be inserted into a deep socket that has been placed over the ship’s shaft. The seal should be driven in until it is flush with the engine case. You shouldn’t push it too far.
Additionally, ensure that it is straight Remember that you can harm both the sealing surface of your case and your replacement seal. Once the seal has been driven, remove any extra grease with a rag if you accidentally forced the seal in at an angle.
The shifter can then be installed again, being careful to keep the indexing mark we put previously in mind. Finally, if you removed it, you can use a chain to reattach the countershaft sprocket.
Conclusion
It can be annoying when oil leaks from dirt bikes. You must desire to solve this problem quickly. We have put together this post to help you and have found the answer to your inquiry: why is my dirt bike leaking oil?
If you are a newbie, you could find it difficult to figure out how to stop a bike engine oil leak. How can we understand the technical stuff that only an experienced and professional individual can understand when even a beginner doesn’t know enough tips and tricks?
Therefore, we made the decision to develop a sensible and thorough approach to comprehend the problem of engine oil leaking and how to effectively address it. I sincerely hope you enjoy this article. If so, please subscribe to our newsletter and share it with your friends on Pinterest and Instagram.
Sources: How to find oil leaking
